Blog

For the love of La Fleur

La Fleur has arrived! This design has been something that has been waiting to get out and has finally come to fruition.

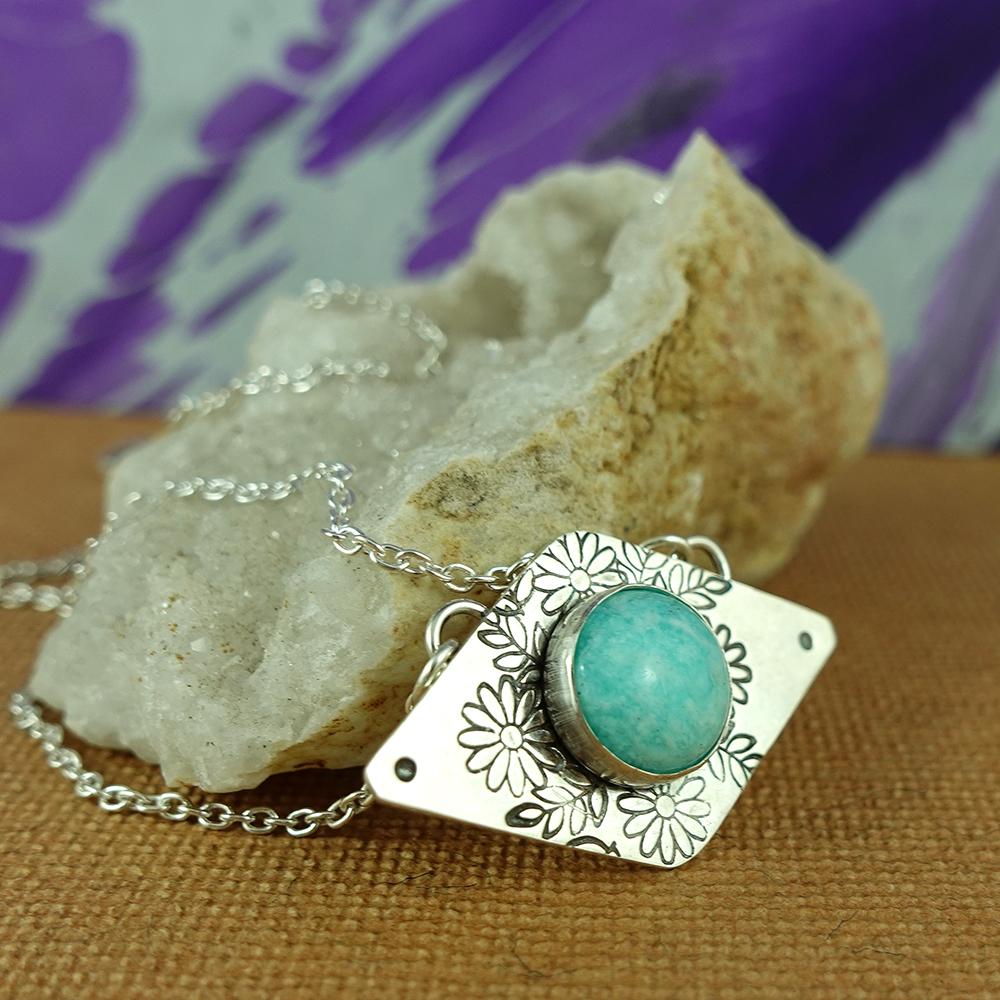
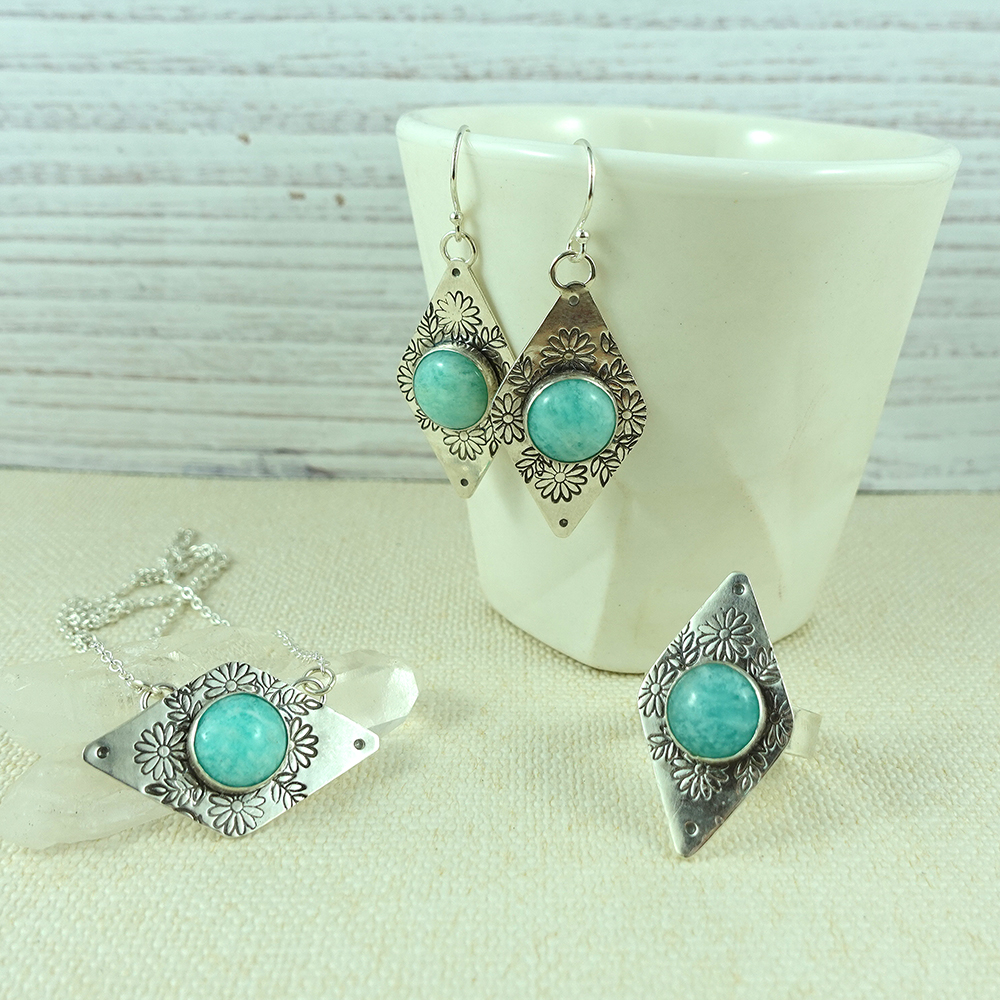
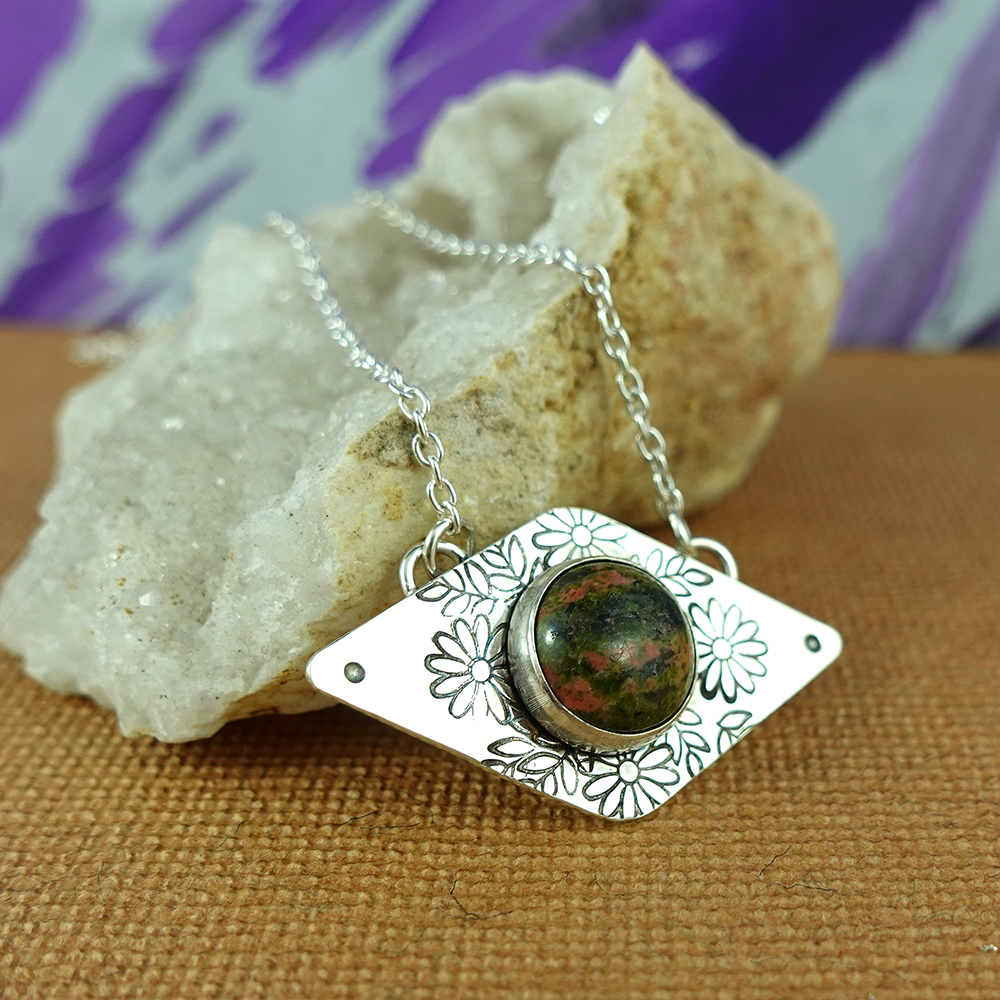
La Fleur literally translates to ‘the flower’. The focus of the design was to use the Daisy motif as the basis for the design and through repetition and form create the design.

With inspiration in mandalas and the concentric patterns of the east combined with this very 70’s style Daisy, the design is new and interesting.

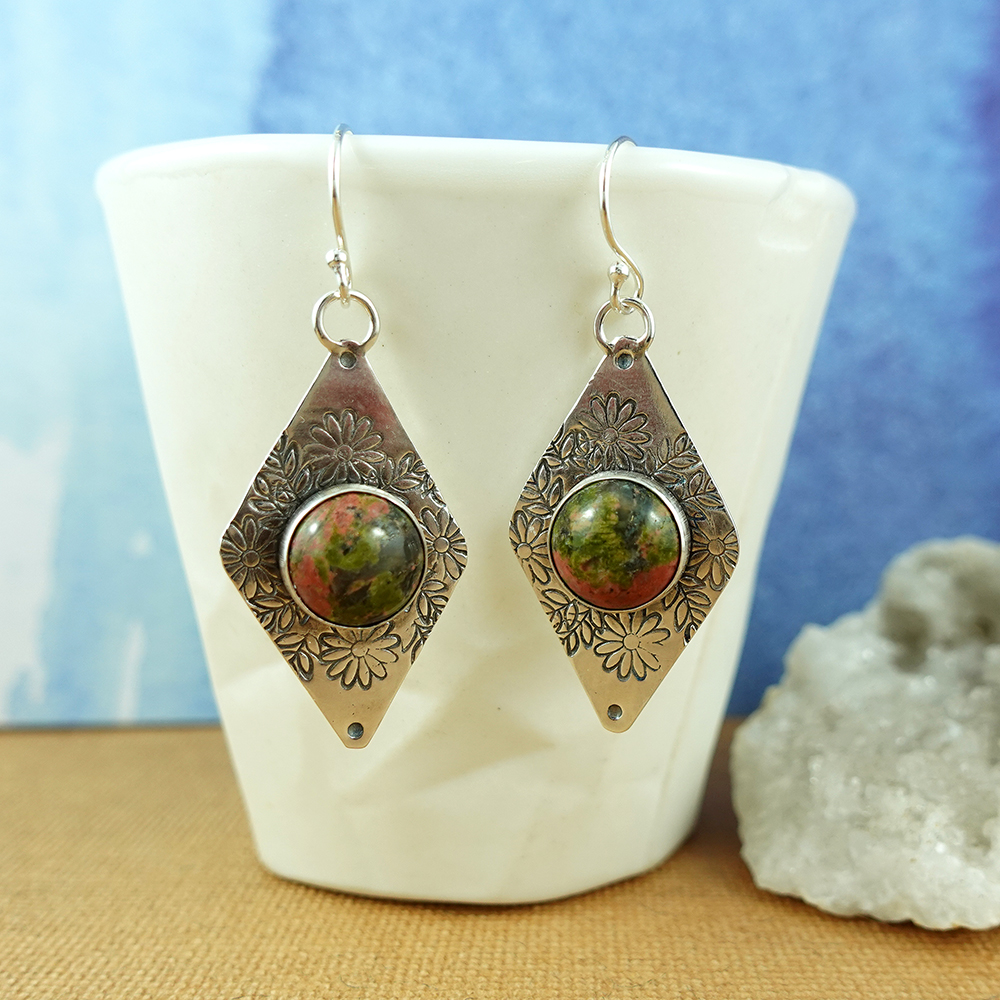
In the Mandala structure and the natural imagery, the design is like looking at a bouquet of flowers from above and the stone being the centre. That way you see it at full bloom every time.

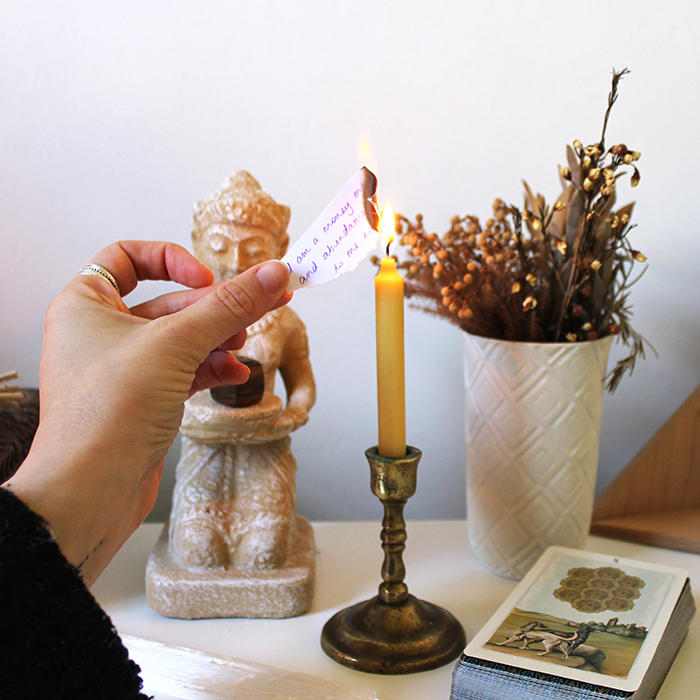
As it’s Spring here, the transformation of the garden is always amazing to me. To see everything so bare and sparse to being rich with colour, reminds me to move forward and be ok with transformation within myself and bloom to my true potential.

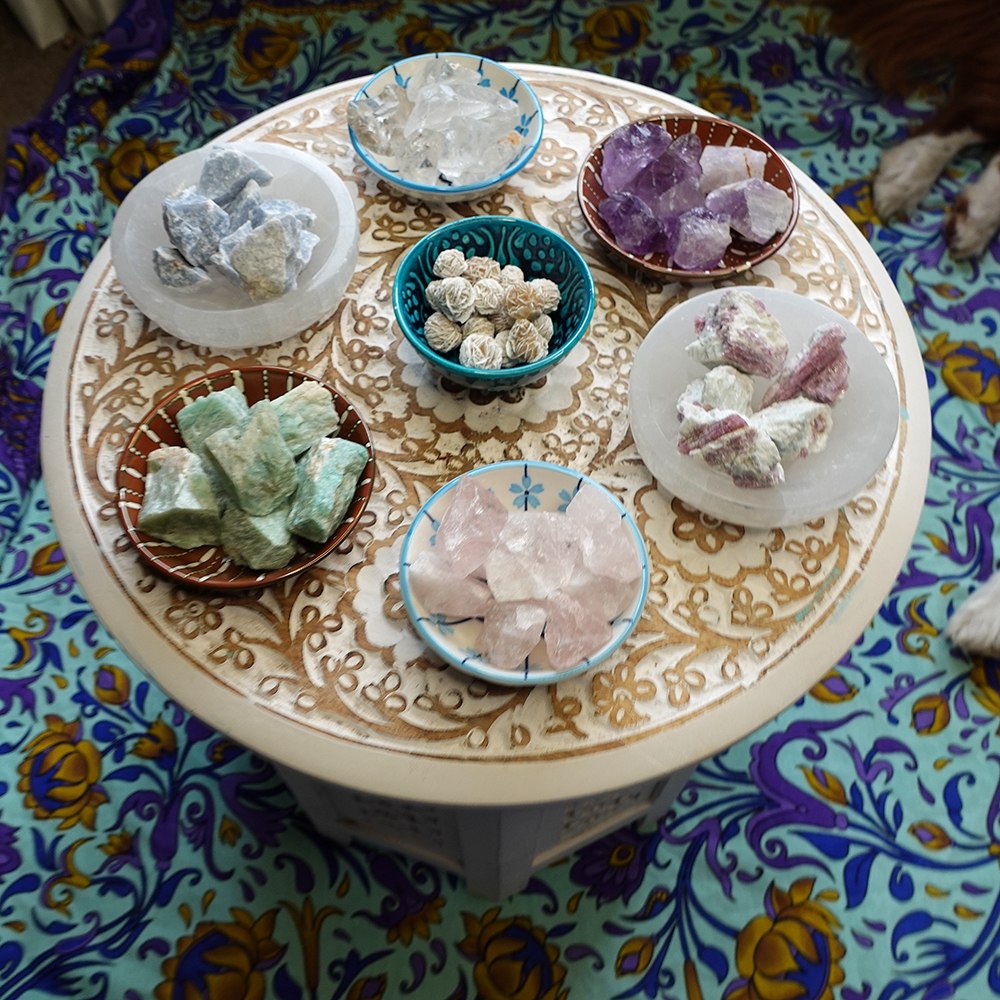
Once the daisy mandala design was finalised, the next step was to choose the stones!

I went through many iterations as this design lends itself to many interpretations, but finally chose ones that complemented and enhanced the details to make a harmonious piece.

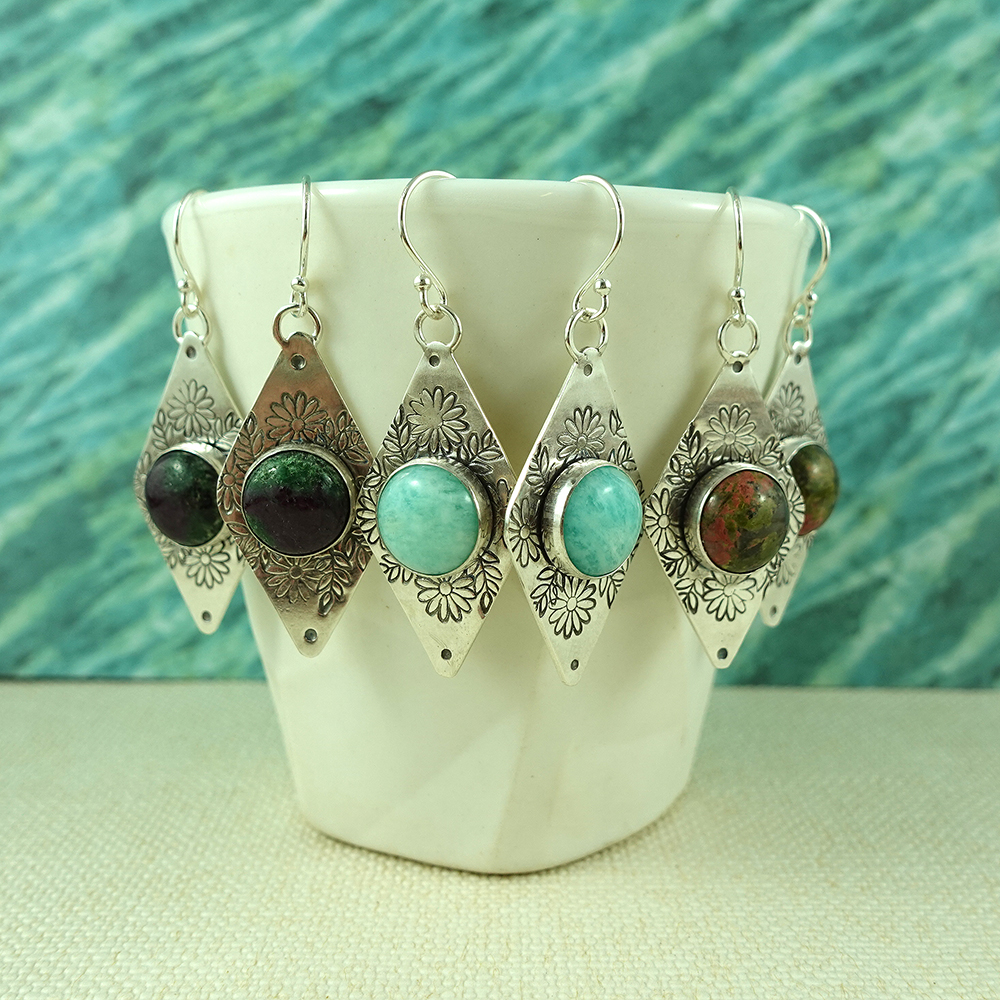
The final stones for the full collection being Amazonite, Ruby Zoisite and Unakite and an additional Amethyst and Rose Quartz for the Rings.

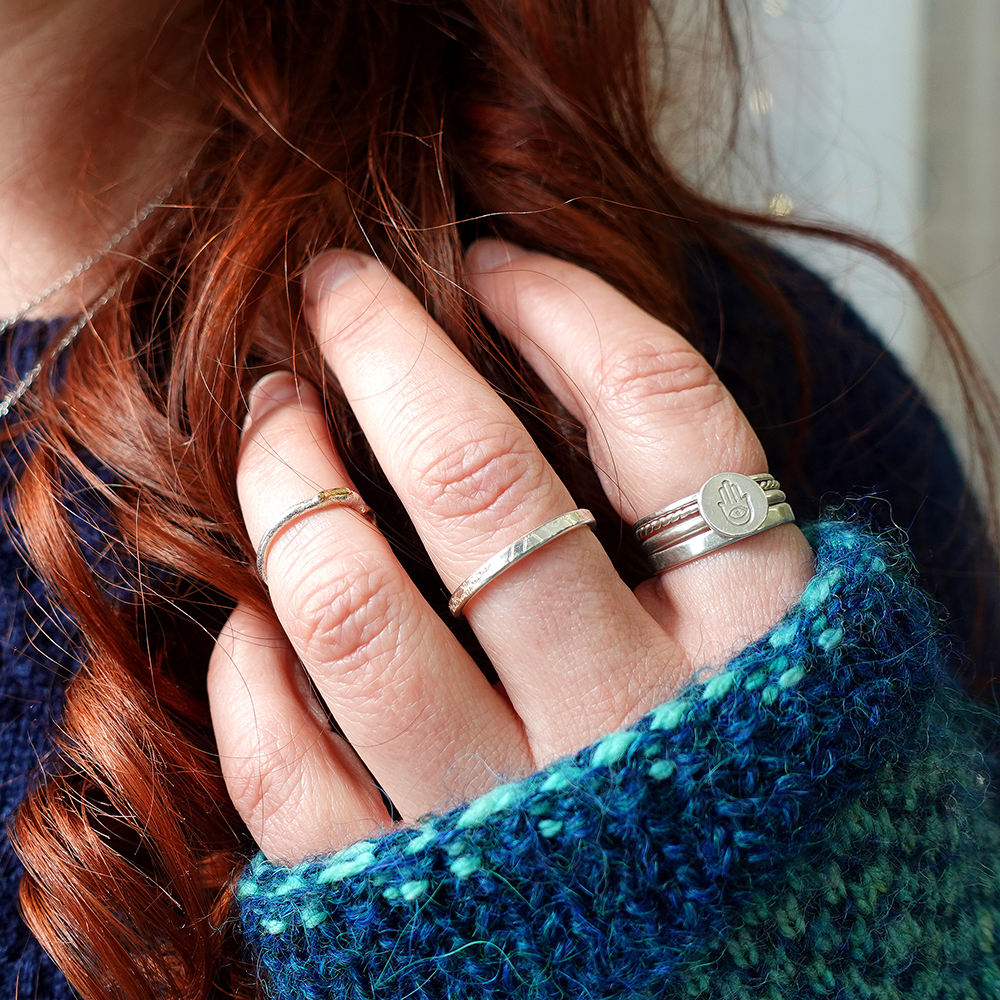
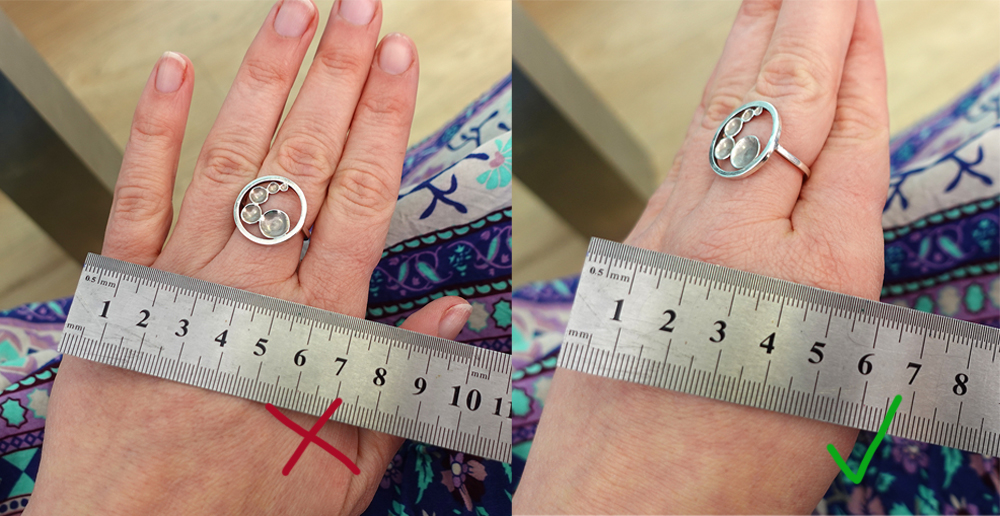
As most of you know here at ASC we are we love to make sure we have lots of sizes of rings for all of you individually sized people. The logistics of this can be challenging so making an adjustable ring was my mission.

With a substantial ring band to hold not only are large shape and stone but to also keep the tension so that you can have a strong, yet adjustable ring.

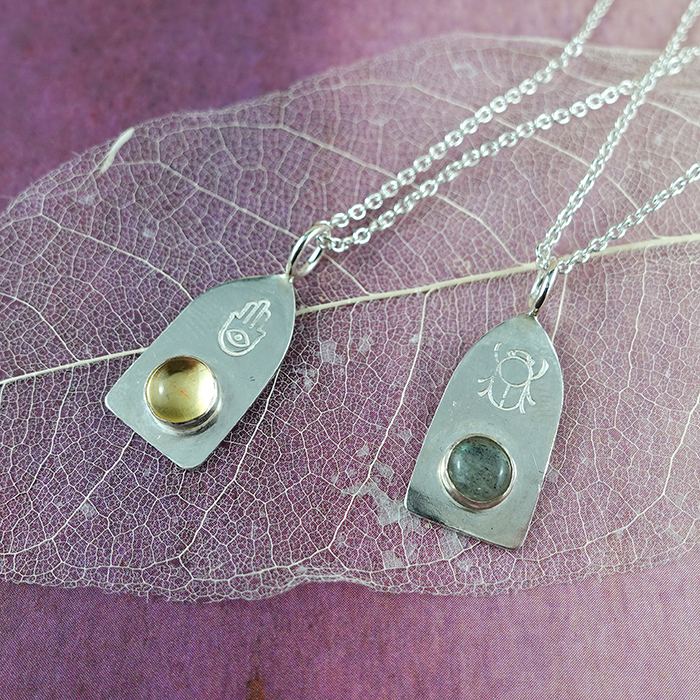
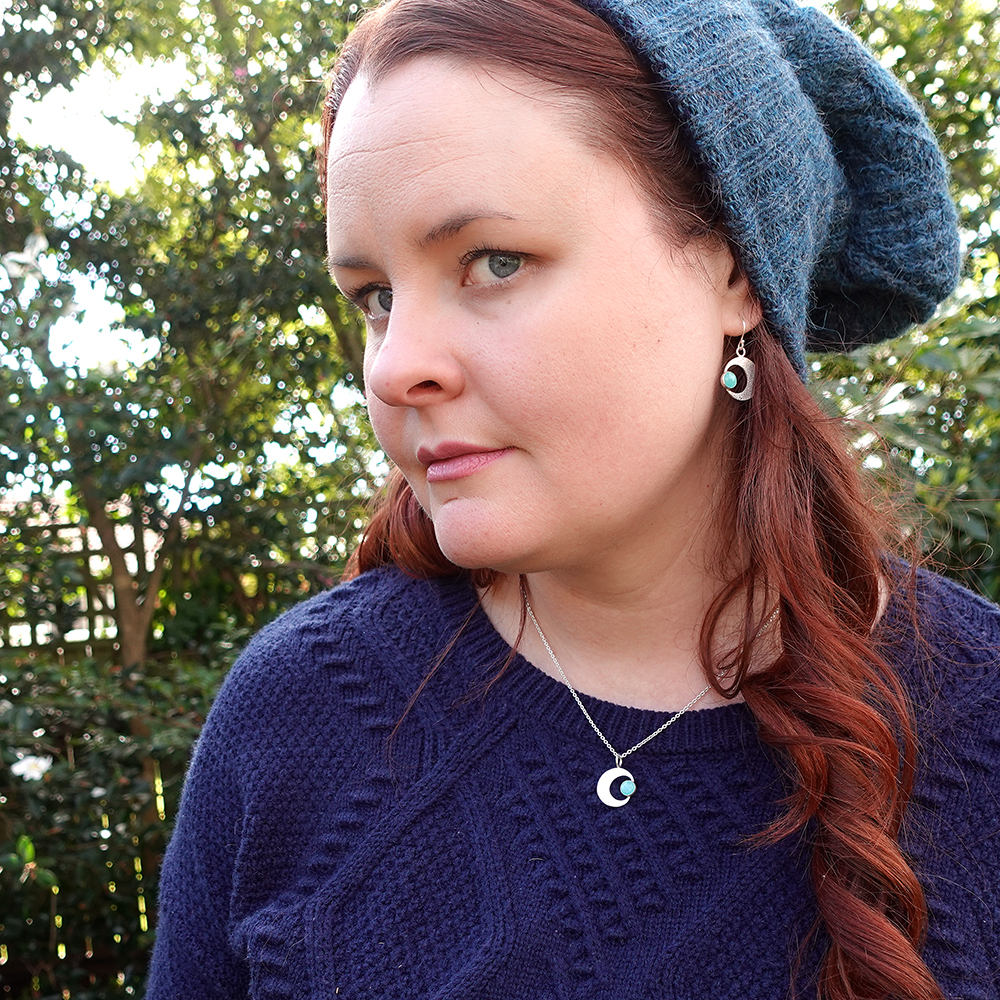
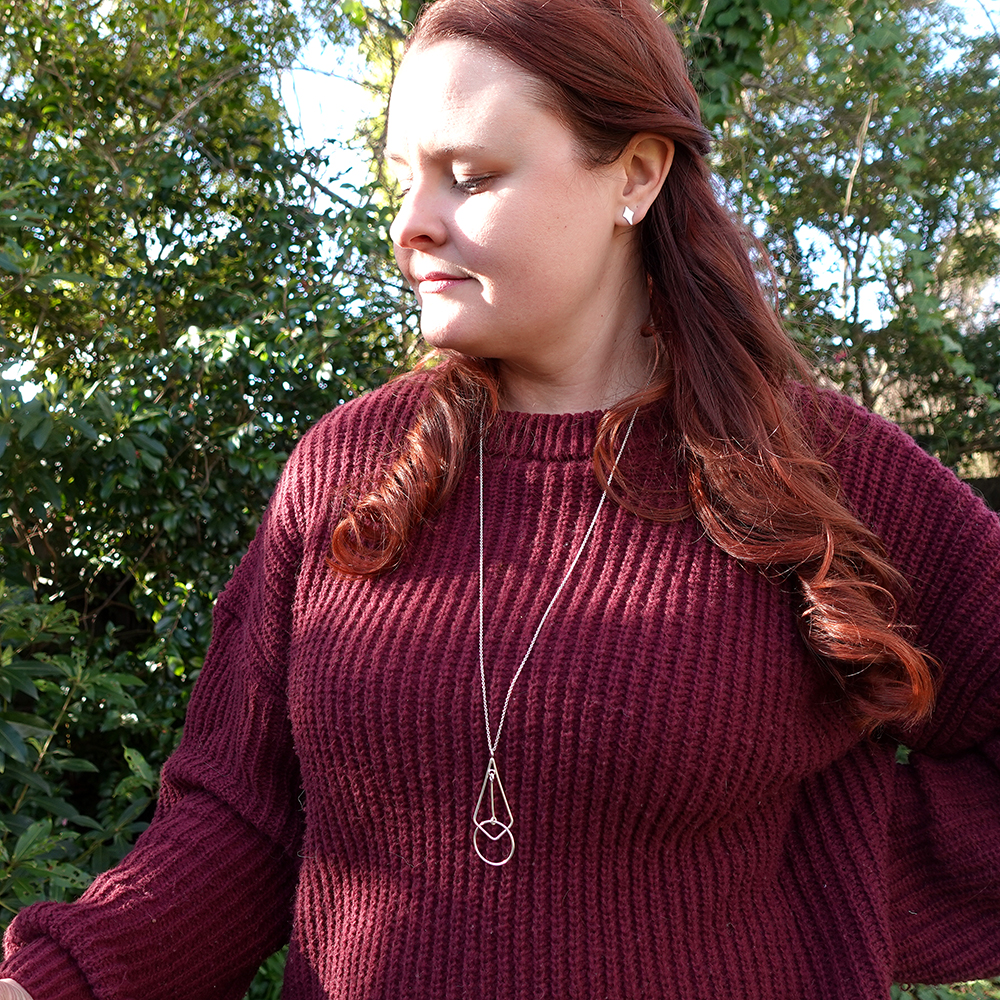
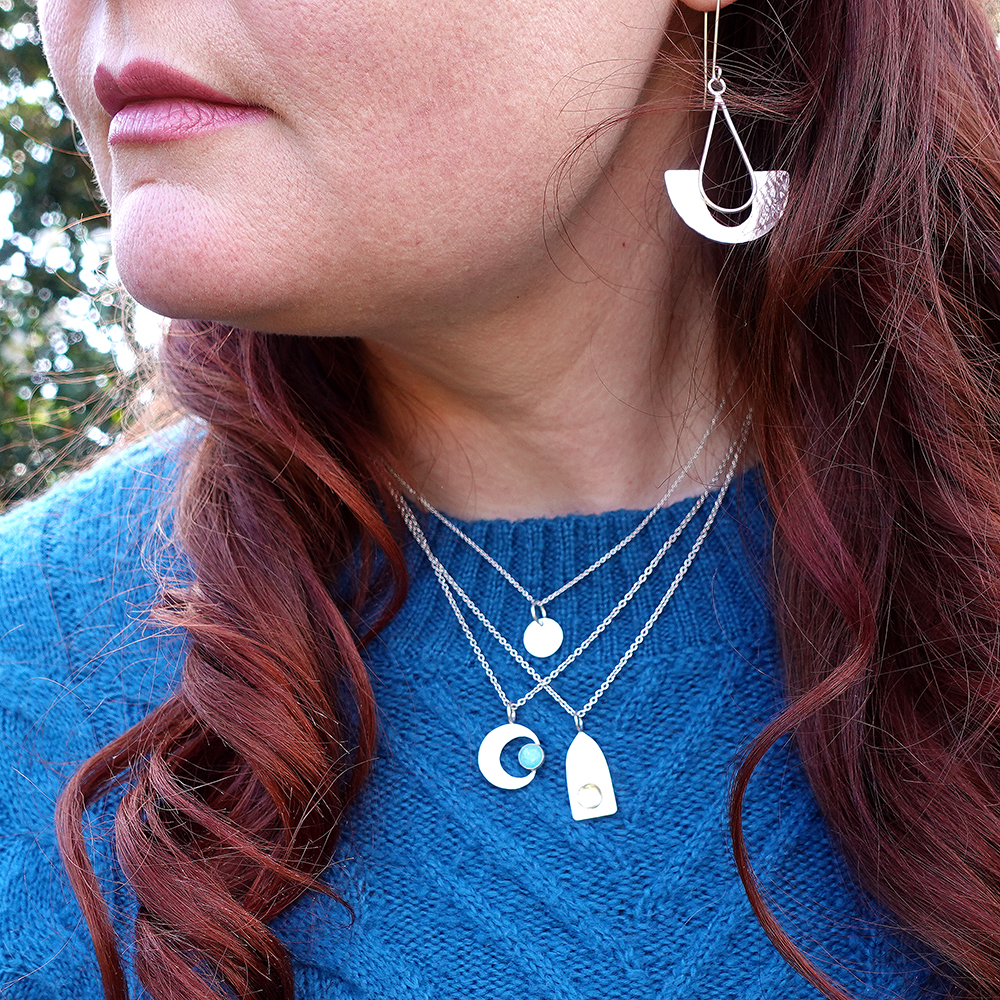
Another point of difference in the collection is the Necklace. By choosing to orientate the design, it gives a fresh look that makes it fun and easy to wear.

I hope you have enjoyed exploring the design process of this new collection. It is always an exciting time in the studio when a new collection is coming into being and I look forward to seeing you all wearing the La Fleur Collection!

xx Corinne

Glass Workshops Explained

The Glass Workshops are now in full swing, so I wanted to use this blog to dive into the process of the workshop so you know what to expect or for those who live too far away to attend to live vicariously!

STEP ONE: CHOICES

The hardest part in any workshop I teach is helping people make decisions! Haha! From the decisive to the decision paralysed, it’s a hard line to stick to in order to guide but not influence students.

The workshops have been designed with set patterns to ensure they are all achievable not only in the time frame but also in the ability of a beginner starting. Choosing the colours and patterns of your glass can really change the overall look of these simple designs and change the overall effect.

STEP TWO: BREAK SOME GLASS!

A lot of the time you hear about cutting glass, but we are actually scoring the glass with the lines of the pattern pieces then breaking. Glass is going to break how it wants to, not always how you want it to, it’s important to have a little practice to get the hang of it.

STEP THREE: GRINDING!

Once all the pieces are ready, it’s Grinding time! This is a bit like filing metal but with more noise, water and sharp edges! This step ensures your pattern fits together well and that all edges are smoothed ready for the next step. Once done, wash to remove all glass dust.

STEP FOUR: COPPER FOILING

We bring down the intensity for the next step as we are copper foiling. This step wraps a thin piece of copper around the glass and sticks to the sides, top and bottom of the glass. This will form to basis of our joins that will hold the piece together.

STEP FIVE: SOLDERING

The longest and most intense step is the soldering. Using a soldering iron, we melt the lead solder over all the copper foil to join all our pieces together. This can be tricky to get consistent lines but is so satisfying to see the metal melt!

STEP SIX: TO CAME OR NOT TO CAME

Once all our lines are done, we can choose to came wrap the piece or leave the edge. The came can hide some inconsistencies but at the same time can be a bit tricky to attach.

STEP SEVEN: FITTINGS

The last little soldering task can be a tricky one is to attach jump rings so that you can hang the piece.

STEP EIGHT: A GOOD SCRUB AND PATINA

Into a hot soapy bath to clean off the piece then it’s time to patina. Choosing to keep it silver like the solder or blacken it. Both have their benefits and can really enhance your design.

STEP NINE: WAX AND FINISH!

Once that is done and dry, a little wax polish to seal peice and enhance the patina. Then the last decision of the day is to choose a coloured ribbon to hang the piece and complete it!

I hope you have enjoying this detailed dive into the process of Glass Making Workshop. I hope to see you in the workshop soon to make one! If you have any questions regarding the workshops please feel free to reach out via email asilvercircledesign@gmail.com

FURTHER VIEWING: To see the available designs for the workshop, head to the Glass Pattern Page linked HERE.

Tools for Manifesting

We all want to manifest our desires, but sometimes we go about it with a whole lot of energy at the start and then wane after a day or so.

I have experienced this over and over, so I love to use different tools to tap into that manifesting energy so I can keep the momentum. Here are my go to ways to renew manifesting energy.

JOURNAL AND PEN

If you have been here a while, you know I love Morning Pages (free writing morning journaling exercise created by Julia Cameron in the book The Artist’s Way) but over the years I have adapted it a bit and my final page is check in with the energy of the moon, my intentions for the month, affirmations, gratitude as well as my yearly goals.

This practice can keep you on track and keep that goal at the front of your mind everyday.

Check out our Journals on sale now!

TRANSFORMATION/ABUNDANCE PENDANT

Aligning your energy to your goal can help keep you on track. As a Jeweller, I love creating pieces with specific energy and the Abundance and Transformation Pendants are the perfect energetic alignment for manifesting.

The Abundance Pendant is perfect for reaching some financial goal or energy of joy and prosperity. While Transformation can align you with the energy of being ready to shake things up and move forward.

STICKY NOTES

Having a few sticky notes to write your affirmations, goals or ideal life can help keep it fresh in your mind each day as you brush your teeth, make your morning coffee or when you are getting ready. For me, i love it just beside my reading chair as I have a morning cup of tea.

CRYSTALS

I love having crystals around my home and studio. Not only because they look beautiful, but also because they have a beautiful energy that can help align with your goals.

My go to crystals to have in the studio to keep me on track towards my goal is Apatite, Clear Quartz and Fluorite for focus and concentration.

In my meditation space i have lots of Amethyst and Rose Quartz to align with self love and intuition.

If you are looking to attract Abundance – citrine or pyrite are a perfect companion. To find more calm – Amazonite is a beautiful addition and to protect your energy Black Tourmaline will be your protector!

SELENITE BOWL/PLATE

Having a beautiful spot to keep your tools, crystals and jewellery to keep them cleansed and ready for you to use with your goals in mind can be so helpful. Selenite is a natural cleanser and these bowls can help keep everything you are working with in one place.

CANDLES

I love using candles to channel an intention. Through using different colours and anointing a candle can really channel your goals and the things you are working towards. If you would like to dive further into manifesting using candles, please check out our blog Manifesting with Candles.

I hope you have enjoyed a little dive into the tools i love to use to manifest. I would love to hear from you – what are some of your favourites tools for manifesting either from the list above or from your own experience??

x Corinne

Winter Styling

Here in the Southern Highlands, Winter can be a bit frosty and most of the time my focus is on just staying warm, that I don’t play around with styling my jewellery as much as I would in other seasons.

So it is time to change that! I am bringing you all along for the ride as we restyle for Winter!

Let’s get into it!

EARRINGS


Maya Fan Earrings.
Wear a feature earring with your favourite coat and your hair flowing!

Our new Moon Earrings and Pendant a perfect feature for a casual knit look.

PENDANTS

I wear so many more solid colours in winter so long necklaces are a great way to add more interest. My go to is the Geometric Pendant in Circle

Layering necklaces are a great way to add interest and fun while having high necks and coats.
Here I have mixed the Abundance Pendant, Small Textured Pendant and Moon Pendant

HAIR PIN

I am obsessed with this Small 2 Piece Hair Pin and use it so many more ways in Winter. It looks great with hair half up (above) as well as a brooch though knits (below).

hair pin as brooch

RINGS

Some of our staple layering pieces and some new additions great to wear under gloves in Winter without getting caught up. From left: Fused Ring, Lace Ring, and stacked: Thin Hammered Ring Band, Abundance Ring, Twisted Ring, Hammered Ring.

BANGLES, BRACELETS & CUFFS

A simple stack of layering Bangles can give you a little feel of movement when wearing lots of layers. Here we have the Pentagon Bangle, Lace Bangle and Spiral Bangle along with the Hexagon Ring and ring stack with Twisted Ring, Fused Ring and Hammered Ring.

Such a gorgeous mix of everything here. I love this with a feature coat or rolled cuff jumper to really add some shine. Here we have from left: Daisy Bangle, Pentagon Bangle, Ziggy Cuff, Spiral Bangle, Focus Bracelet and Lace Bangle.

Thanks for coming along as I share with you new ways I am playing with styling some key jewellery pieces this Winter. I would love to hear how you love to style your jewellery through the winter season, so please let me know via email or Instagram (asilvercircledesign@gmail.com or @asilvercircle)

x Corinne

A Full Circle Moment with Bangles

silver bangles sustainable handmade stacking

Bangles have been one of those Jewellery pieces that I used to be a go and and would wear in abundance! Jingling and jangling all over the place. As I became a full time jeweller, I started to find they were a bit of a pain to wear when working and eventually just stopped wearing them. Therefore I was not as inspired to make them for a while.

With the launch of the Bangle Making Workshop, I knew it was time to get back into making and wearing Silver Bangles!

handmade silver bangle astrology archie daisy

DESIGN

The journey of designing this collection started with the feature Bangles and was so fun experiment with so many ideas and get into the design process. An Astrology themed one was a must and loved featuring all star signs, stars and moons flowing around the band.

bangle sample textures and drawings

The Patterns were a little harder to crack as my designs on paper came out ver busy and intense in person, so I went with the Archie design as it had movement and flow without being intense!

Lastly the Daisy Bangle came out a love of nature and a love of the 70’s vibe. After having the Daisy Jones and the Six soundtrack in my head the whole time I was designing, it needed to be in the full Flower power theme!

spiral bangle sustainable handmade

The thinner bangles were an exploration of texture. So i pulled out the very heavy rolling mill and got to experimenting! From this the Lace Bangle was a quick decision and the the Spiral had a few false starts before it came into its own with both a rolled texture and then twisted to get the unique spiral formation.

The Pentagon Bangle was the last of all to evolve even though i sampled this exact design for the workshops, i was wanting to find a new way, but sometimes you just have to go with your first instincts and commit!

Pentagon Bangle Silver Sustainable Handmade

SIZING

Getting the right size bangle can be tricky to work out online, so I have put together a sizing guide! Check it out here: BANGLE SIZING

STYLING

I love playing around with different ways to style these new Silver Bangles. Reminiscing of my past favourites and coming up with some new combos including the Bracelets and Cuffs in my collection.

bangle styling bracelets sterling silver handmade sustainable

Featured Pieces: Top Left: Astro Bangle, Daisy Bangle, Archie Bangle. Top Right: Spiral Bangle, Daisy Bangle, Intuition Bracelet, Lace Bangle, Pentagon Bangle. Bottom Left: Pentagon Bangle, Lace Bangle, Daisy Bangle, Spiral Bangle. Bottom Right: Astro Bangle, Focus Bracelet.

bangle styling bracelets sterling silver handmade sustainable

Featured Pieces: Top Left: Spiral Bangle, Daisy Bangle, Intuition Bracelet, Lace Bangle, Pentagon Bangle. Top Right: Pentagon Bangle, Lace Bangle, Spiral Bangle. Bottom Left: Astro Bangle, Daisy Bangle, Archie Bangle. Bottom Right: Pentagon Bangle, Lace Bangle, Intuition Bracelet, Ziggy Cuff

CUSTOM

Finding something exactly what you want can be difficult and so you have the option of joining one of our Bangle Making Workshops to create it! Choose from either a Thicker band like our Daisy, Astro or Archie Bangle and make it your own. Or choose the stacking bangles and create your own textures using different hammers.

bangle workshop silver sustainable handmade

Thanks so much for joining me on this full circle journey of getting back into wearing and making Silver Bangles. I hope you loved coming along with me and I would love to see how you style your bangles, so please let me know via email or Instagram (asilvercircledesign@gmail.com or @asilvercircle)

x Corinne